Setting up a proxy server can be a necessity for some, but not all people know how to do that. In today’s guide, we’ll explain how to set things up in WinGate, an old but still very popular tool for creating a proxy server.
Whenever we talk about something internet-related, we often mention the importance of certain services. They weren’t around in the olden days when the internet and everything else was simpler, but today, we need them.
Regardless of whether we’re talking about them making our lives easier or speeding up a process, there’s likely a service for that, and you should use it. There are plenty of services for various use cases, and the one we’ll be talking about today is proxy-related.
There are use-case scenarios where you may need to set up a proxy for home or office use. You can do that manually, but that takes time and knowledge, which is where certain applications come into play. One such tool is WinGate, an application designed to make your life easier when it comes to creating a proxy server.
In today’s guide, we’ll talk about how to set things up with WinGate, but first, let’s talk about the tool and what it actually does.
What Is WinGate?
In the world of proxies, setting up a proxy server can be crucial from many standpoints. You can add a layer of security and manage or filter content, which is where applications like WinGate come into play. This is an application you can set up as a proxy server, allowing you to do all those things without in-depth knowledge of servers. As a result, you can achieve the same thing much faster and have a better way of managing things.
As a proxy server, WinGate offers all the features you’d need to manage it. Starting with the basics, this tool allows you to create the server, meaning that any device connected to it will route the traffic through this tool and the machine it’s installed on. This allows you to manage whatever is happening on the network and ensure that everything is used as intended.
The idea behind running a proxy server like WinGate is that it offers multiple advantages when compared with running an open network. With the management and filtering aside, you’re also looking at better protection against viruses or spam. In addition to that, you should also see some performance improvements thanks to the DNS caching option.
Many people won’t be fans of the interface. It’s not the sleekest or the easiest to get around, which is why we’re making this guide. With that said, It’s important to note that with the interface aside, WinGate offers a lot of features.
Getting all of these features isn’t something that’s free, meaning that WinGate is a paid product. A good thing about it is that you can get a 30-day trial to test how the tool works and if it’s worth paying for. You can activate the trial easily, and once you’re convinced, you can pay for the license and get the service without any time limitations.
How to Configure WinGate?
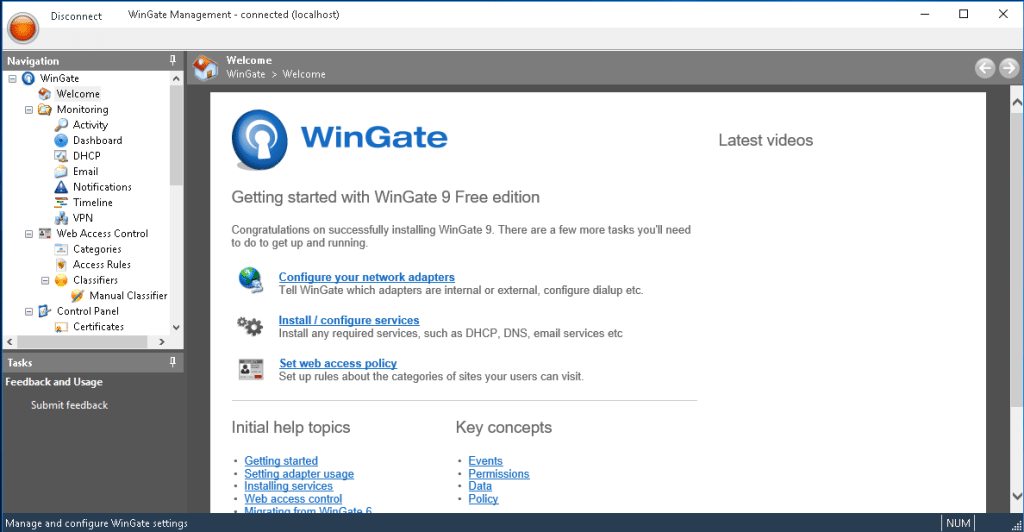
Like with most similar tools, the process starts with installing and running the tool. WinGate is available for Windows computers, and since there is a trial option, you can download and test it out before paying for the license. With that installation out of the way, the first step is to launch the application.
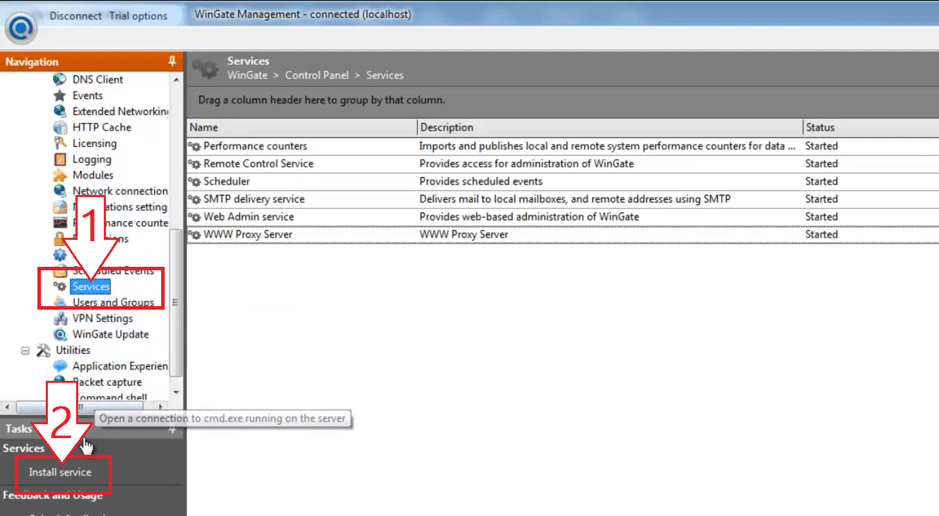
From the left navigation menu, you’ll need to scroll down and select “Service.” Bellow that there is a button that says “Install Service” and click on it. This will open a new window where you’ll need to set up the details of the proxy server.
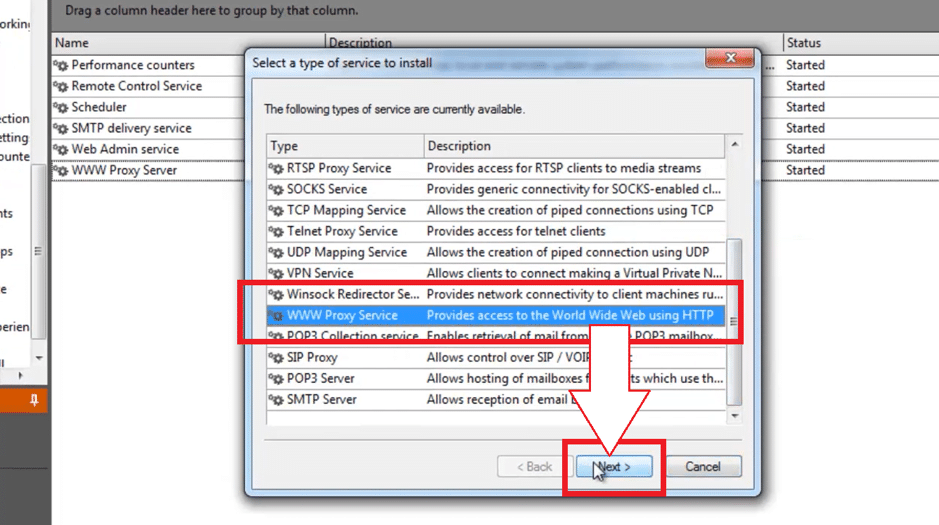
From the new window, the first thing you’ll need to choose is the type of proxy server you need to create. This depends on your use case scenario, meaning you should choose what you need. For this example, we’re going for the WWW server. Once you choose the option, click “Next” to continue the process. The next step is to add the name for the server, and to complete the process, you’ll need to click on “Finish.”
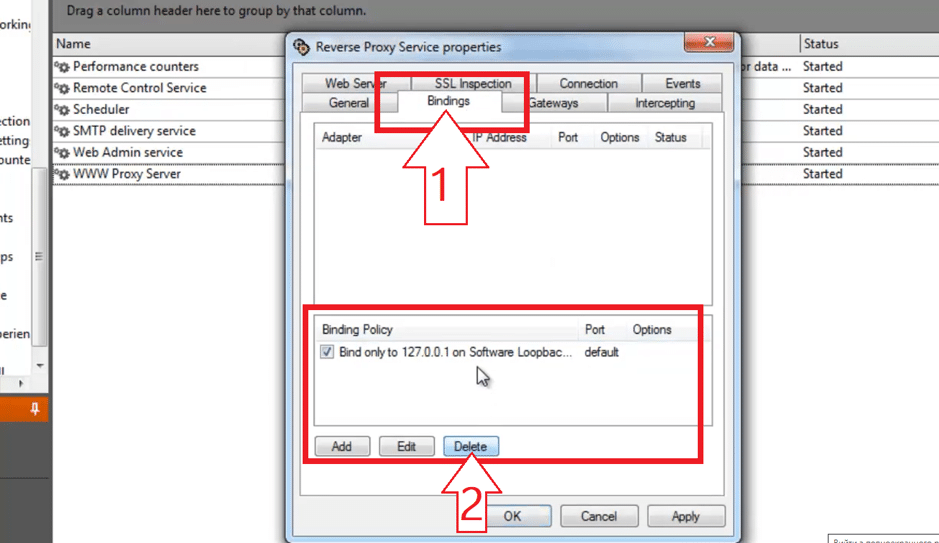
Once that is done, another window will open where you’ll need to set up a few more things. From the properties window, you’ll need to navigate to the “Bindings” tab. In the bottom half of this section, there are binding policies, and the default one needs to be removed. To do that, click on the proxy to select is and click on “Delete” to remove it. The next step here is to add a new policy. Choose “Any External Adapter” from the new section and click “OK“.
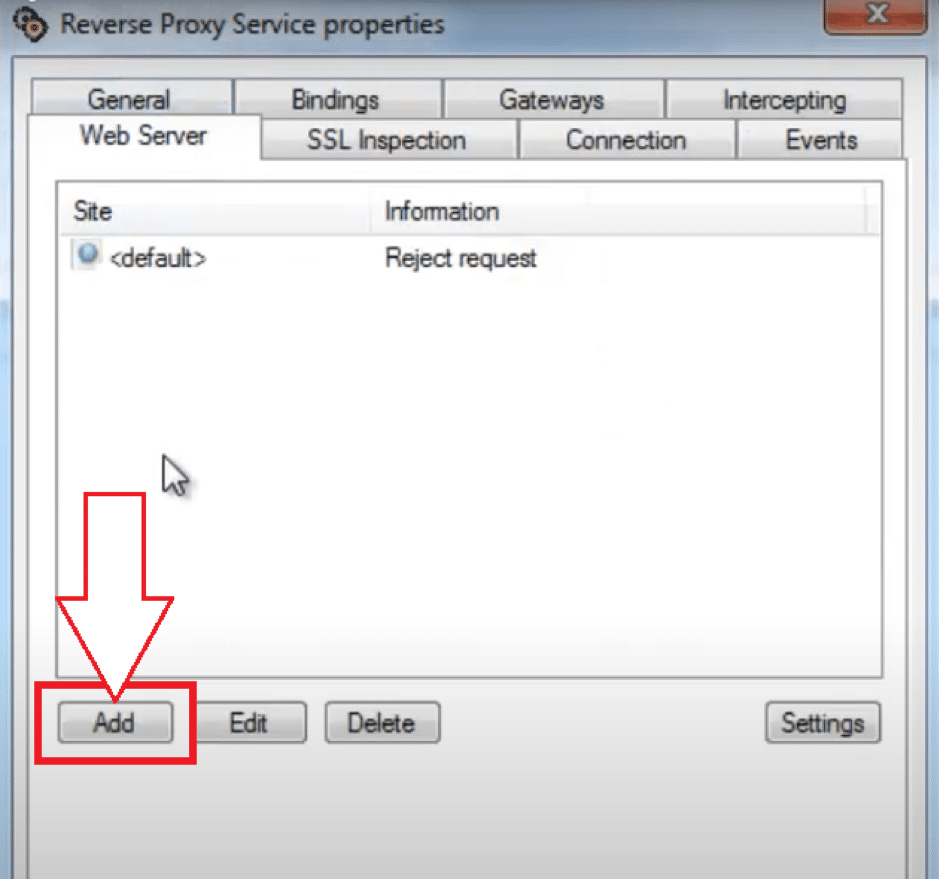
Once you add the new policy, navigate to the “Web Server” tab. Here, you’ll need to click on the “Add ” button. From the settings section, you’ll need to click on the dropdown menu and choose the action you want to set up. For the most part, choosing reverse or individual is the one you’ll want to choose. With that said, choose the one that suits your needs the best.
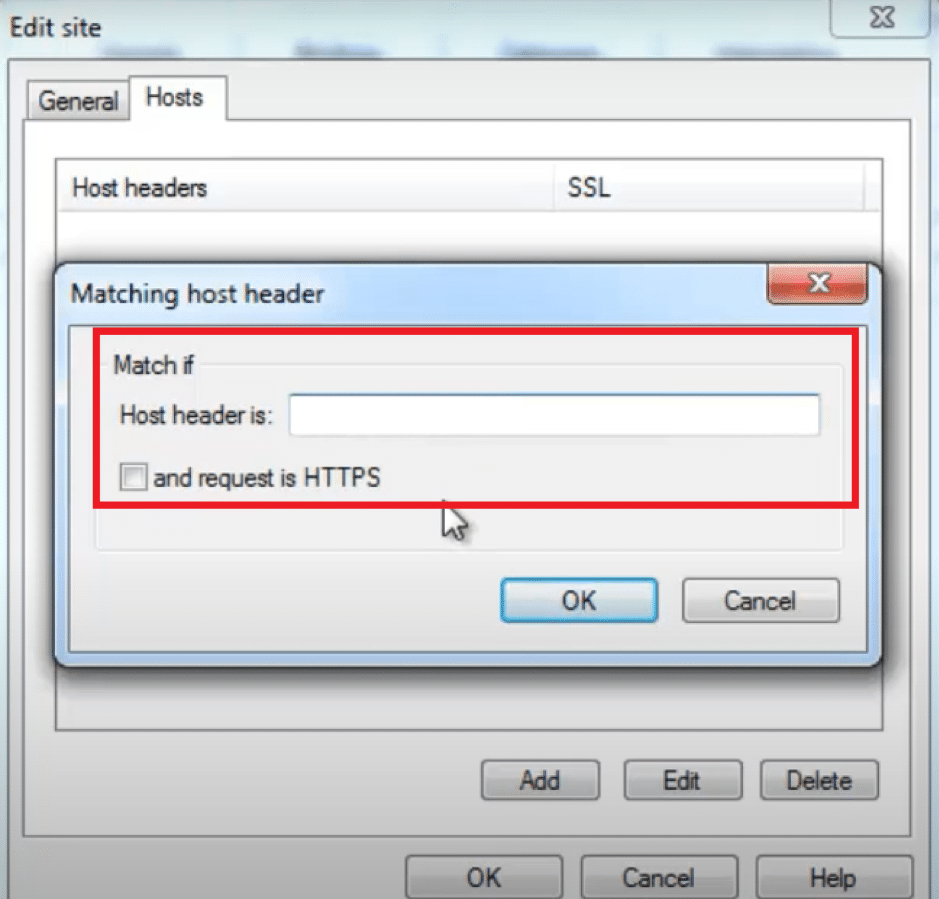
The final step of the setup process is in the “Hosts” tab. From here, you’ll need to write the address of the site that you want to have linked with the specific IP address. Once that’s done, click “OK” and everything will be set, and you’ll be good to go with your server.
With the basic setup out of the way, let’s talk about some of the commonly asked questions regarding setting up WinGate.
Which Protocols Does WinGate Offer?
WinGate is a very flexible option, meaning that you have a lot of flexibility in terms of setting things up. When it comes to supporter protocols, you have the option to choose between HTTP or HTTPS and SOCKS proxies, depending on your use case scenario.
What Kind Of Proxies Does Wingate Work With?
As far as the type of proxies, WinGate is flexible enough, meaning that you can use any type that works for your use case. The service doesn’t limit you in terms of the proxy type, so the type won’t limit you in any way.
If you’re after proxies that are less likely to get detected, you can go for residential or mobile proxies; WinGate won’t limit you in any way. On the other hand, if you’re after faster proxies, you can go for the datacenter options, which this tool won’t have any issues with.
How Long Will The Free WinGate Option Work?
The main thing to note about WinGate is that it’s not a free option. With that said, the tool offers an option to work with it for free for a certain time. WinGate has a trial period of 30 days, meaning that you can test it for a month before you need to purchase the license.
The best part about this tool is that there aren’t any limitations in the trial apart from the duration, so you get a full service with all the features. With that said, it’s important to mention that you’re limited to 10 users only with the trial option, which should be enough to test out the service.
How Many Clients Can WinGate Serve?
WinGate is designed to act as a proxy server, meaning it can do that regardless of whether we’re talking about 1 or 1 million clients. The most important thing to note here is the server configuration in terms of the hardware.
Running the server on a lower-tier machine means it will show some weaknesses as soon as it sees more clients than it can handle. This is because the CPU and RAM won’t be able to deal with all the clients, so you should consider using it on a powerful machine if you’re working with many clients.
The most important thing here is the license. Unlike some of its rivals, with WinGate, the price you pay for the license depends on how many users you plan on having. With this service, you’re looking at multiple packages ranging from 6 concurrent users to 250, and the last one is unlimited. We recommend getting the license that suits your needs the best but plan a bit ahead and get a slightly “bigger” one.
Also, you should keep in mind that you can get 3 types of licenses. While all 3 come with the same basic features, there are some differences.
Does WinGate Manage And Monitor Connections?
We mentioned that WinGate offers plenty of features, and among the many are the ones that allow you to manage the connections. As a result, you have the option to keep an eye on the users connected to the server. Among the many features this tool offers is monitoring the connections, part of which covers the filter options.
It means you can restrict certain sites or services or monitor what your users access, allowing you to plan ahead regarding restrictions. Speaking of, as bad as the restrictions may sound, they can be a good thing to keep your network safe from spam or potential attacks from outside sources.
Conclusion
There was a time when setting up a proxy server was a slightly complicated process. Lucky for us, today, things are a bit different. There are loads of tools that can help us speed up the process and make it a lot more hassle-free, and one of those options is WinGate.
With this tool, you’re looking at a simplified server creation process. To help you with that, we created a guide on how to set it up initially, which is a good starting point. Once you have it up and running, you can play around with it and see how it works and how you can set things up in a way that would work for your use-case scenario.