Are you looking for an easier way to use proxies on your Chromium-based browser? Check out today’s guide on how to use the SwitchyOmega extension.

Best Proxies for SwitchyOmega
- BrightData (Luminati Proxy) – Overall Choice for SwitchyOmega
- Smartproxy – Fast Residential Proxies for SwitchyOmega
- Soax – Best Mobile Proxies for SwitchyOmega
- Myprivateproxy – Best datacenter proxies for SwitchyOmega
Proxy usage has been steadily increasing for the past decades, putting us in a situation where our internet adventures cannot go without them. Some people use them for business purposes, while others use them for fun. One thing both have in common is the need for proxies and setting them up.
Purists may say that setting the proxies in your computer’s settings or on your router is the best approach. I’d agree with that, but up to a point. Going for this means setting your computer or all devices connected to your network to work with the proxies. It may be ideal for some people but can be a fuss for others.
What if you want proxies just on your browser? Luckily, there’s an extension for that. The popular browsers on the market have a plethora of options and the one I’m going to outline today is SwitchyOmega and how to use it on Chrome.
Before I dive in, I have to note that you can install it on most Chromium-based browsers. For example, if you’re using Microsoft’s Edge, you can utilize this tool.
SwitchyOmega Features
So, what is SwitchyOmega? It’s a free and open-source extension for your browser that makes applying and switching proxies a breeze. This extension is an improved version of the proxy settings on your computer, meaning that you get more than just setting up proxies.
Right off the bat, the best thing about SwitchyOmega is that you won’t have to dig through the settings to change your proxies. Everything you’ll need is in your browser window, and after the initial setup, everything can be done with a single click.
The advantage SwitchyOmega offers over the traditional method is that you can modify the settings as you need them. You can create different profiles depending on which proxies you use. There is also an option to set up rules so that a different proxy is applied to a different website.
In terms of features, SwitchyOmega isn’t lacking. Flexibility is key, which is why you have multiple ways in which you can modify your profiles and rules. Speaking of flexibility, some proxy providers offer multiple types of authentication, and this tool supports both.
If you are using SwitchySharp, then installing SwitchyOmega will automatically migrate all the data and settings. This extension is designed to replace SwitchySharp, SwitchyPlus, and Proxy Switchy.
How to use SwitchyOmega on Chrome?
The first step to using SwitchyOmega is to install it on your browser. Head over to the chrome web store and click “Add to Chrome” on the right side.
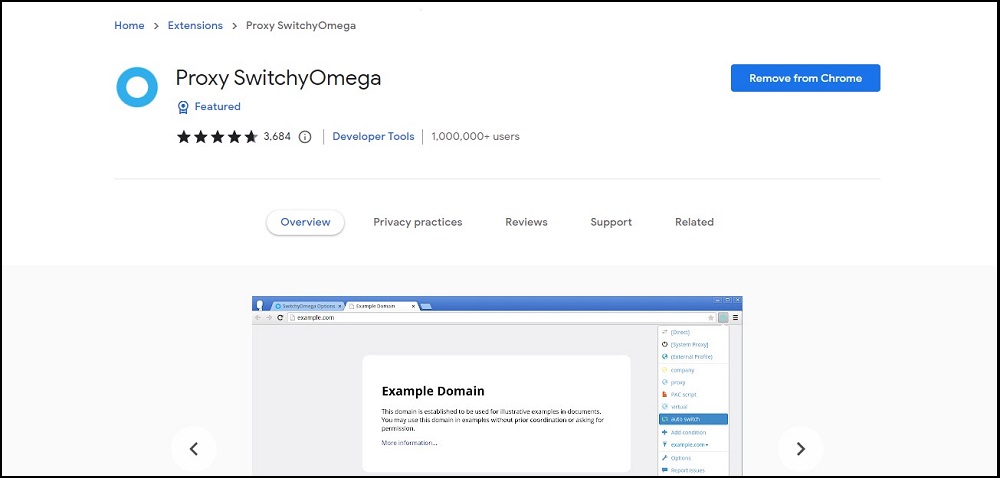
Installing extensions usually takes a minute and is fully automated. Once the process is done, you’ll be greeted with the settings panel of SwitchyOmega.
Setting things up starts in the “Proxy” menu from the left navigation bar. It’s a default proxy profile that you’ll need to set up to get started. This is the simplest way to use SwitchyOmega, which will apply the proxy settings to everything you do on your browser.
You have multiple fields that you need to set up – protocol, server, port, and authentication method.

Starting off with the protocol, you have the standard stuff: HTTP, HTTP2, SOCKS4, SOCKS5, and DIRECT. Choose the one based on the proxies you plan to use. Next up are the proxy server and ports, which you’ll get from your proxy provider. Depending on the provider, the server can come in the form of a URL or an IP address. Finally, you have the authentication method. If you’re going for an IP whitelist, then you shouldn’t change anything because that’s something you’ll be setting up in the provider’s dashboard. On the other hand, if you’re using the username and password authentication method, you’ll need to click on the lock icon and enter the login credentials.
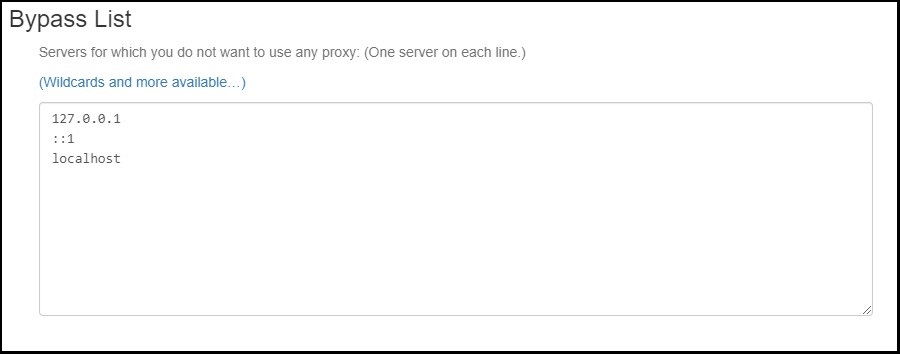
Below the proxy settings is the field where you enter the websites for which you don’t want to use the proxies. This is a great way to eliminate the need to turn off SwitchyOmega whenever you want to bypass it. To add a website, just paste in the URL and make sure that there is only one URL per line. Alternatively, you can paste in IP addresses if you want to.
Once all the settings are done, click “Apply Changes” on the left side, and you’ll be good to go.
How to set up rules on SwichchyOmega?
The process above outlines how to set up a proxy server for everyday usage. SwitchyOmega also has the option to set up some rules, meaning you’ll need to have at least one proxy profile. To make things easier for you, I’d advise you to rename the profiles as you see fit, making it easier to set up the rules.
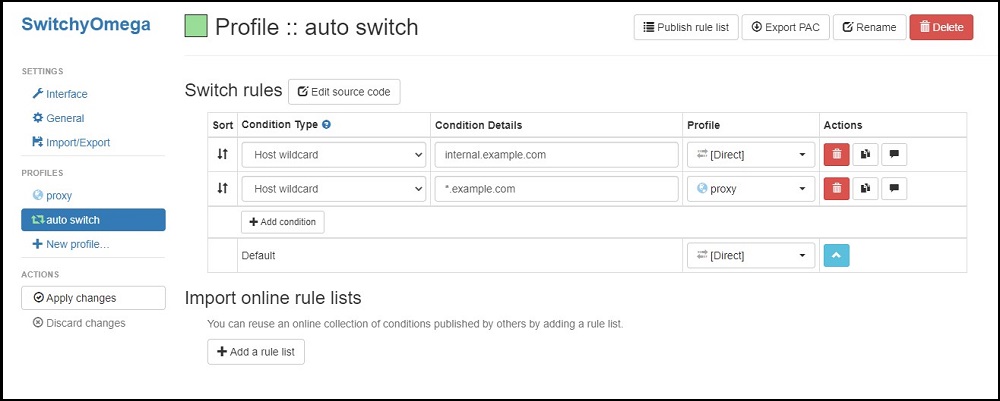
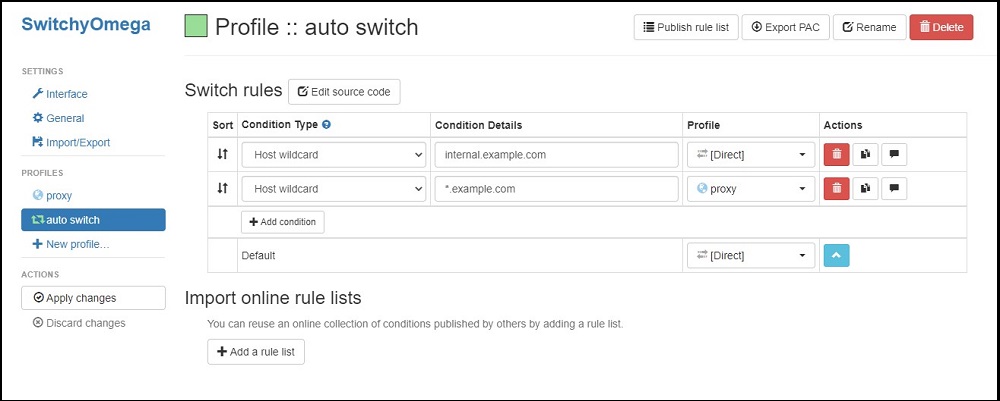
From the left navigation menu, there is already a created profile, “Auto Switch.” Click on it, and you can start setting up the rules.
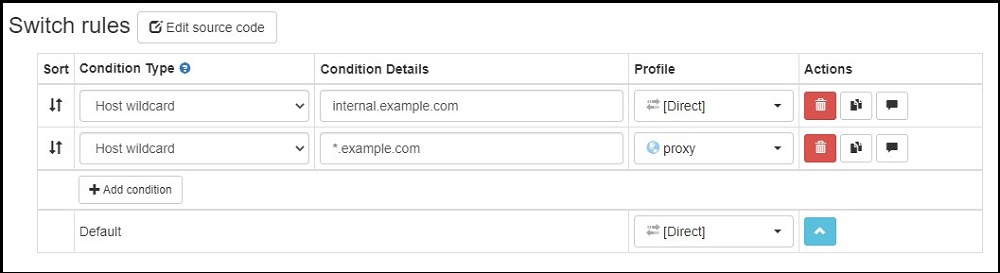
For each rule, you’ll have 2 settings that you’ll need to change: condition details and profile. You will leave condition type as default, as there are changes in Chrome that will prevent you from using the other ones.
In the Condition details, you’ll need to enter the URL you want for a specific condition. Enter the website’s URL or, if the site has multiple domains, add the asterisk sign at the beginning, as shown in the examples above.
Once you fill in the URL, you’ll need to set the condition. As you can see, the default profile is set to direct on the first one, meaning that the proxies will be bypassed. If you want to change that, click on the dropdown menu and select the profile you want to use. You can create as many conditions as you want and assign as many profiles as you want, there are no limitations.
FAQ
Q. Does SwitchyOmega come with proxies?
No, SwitchyOmega only provides you with the tools for switching between proxies easily. To use proxies, you’ll need to purchase them from your favorite proxy provider.
Q. What types of proxies can I use with SwitchyOmega?
SwitchyOmega is a flexible tool, meaning you can use any kind of proxy with it. I’ve used it with datacenter, residential and mobile proxies, and it works flawlessly with all 3 of them. Since the tool also supports multiple protocols, you can use HTTP or SOCKS, depending on what your provider offers.
Q. Can I use free proxies with SwitchyOmega?
Yes, even though SwitchyOmega works with any proxies, going for the free ones isn’t something I’d recommend. These proxies are not the best-performing ones on the market, and you’d be sacrificing a lot. Plus, most of them aren’t the safest choice, especially if you plan to enter sensitive data. My recommendation is that if this is your first proxy adventure, try out the free ones just to see how SwitchyOmega works. If you like it, get yourself some proper proxies.
Conclusion
When using proxies, being able to switch between them is crucial. Some people have no problem doing things manually, but going for something like SwitchyOmega helps speed up the process.
Not only will you be able to switch between proxies faster, but you can also set it to run on auto mode. It means you can do your daily tasks without needing to check or modify anything. Set up the rules, click on the icon on the top of the browser, select “Auto Switch,” and let SwitchyOmega do the rest. It’s a powerful tool that anyone who uses proxies will find useful.